When reading a road bike geometry chart, you’ll come across a series of measurements and angles that determine how the bike will handle, and how it will fit a rider.
Here are some of the most important terms you’ll come across and how they affect how the bike handles.
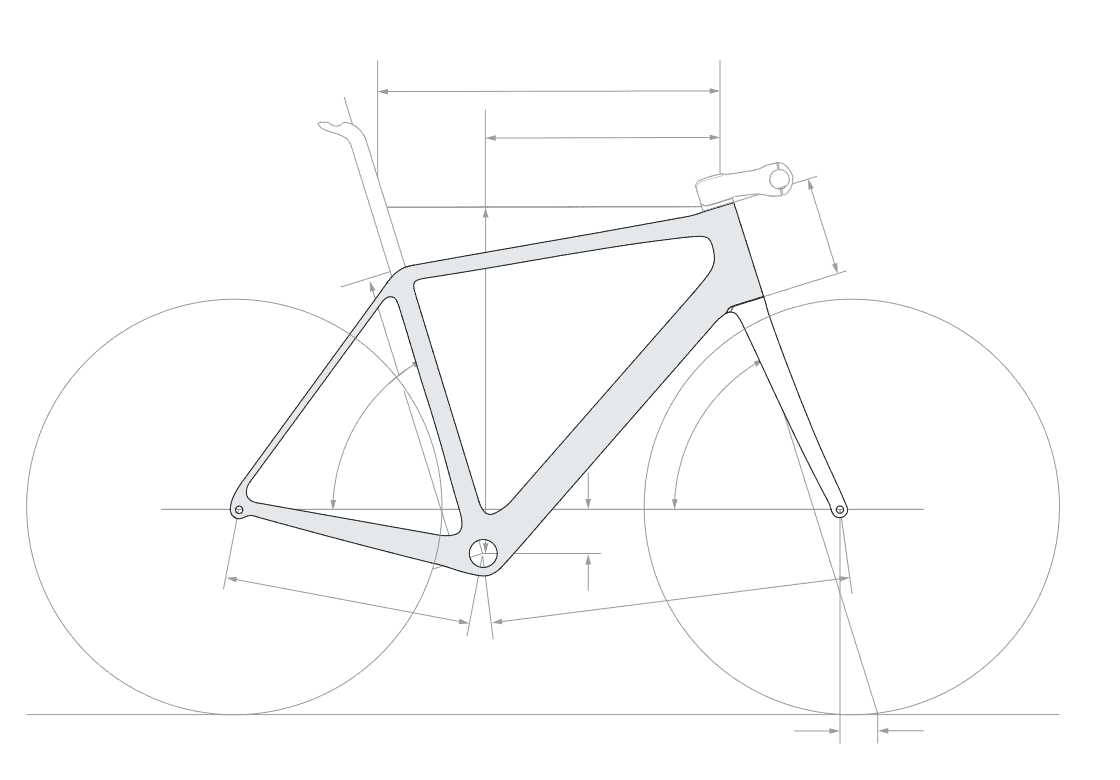
Reach
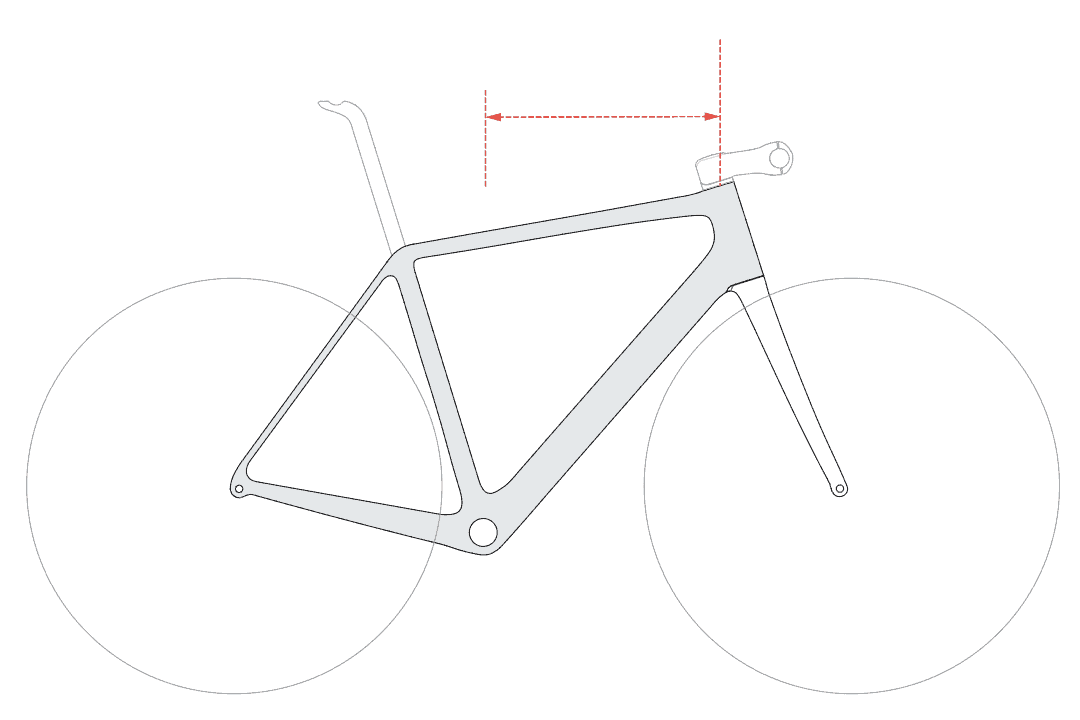
Reach is a horizontal measure from the center of the bottom bracket (BB) to the top center of the head tube. It’s a vital measurement for road bikes as it directly affects how ‘stretched out’ you will be while riding.
This measurement is independent of the seat tube length or saddle height, so it provides a more consistent comparison across different bike sizes or styles. The appropriate reach depends on your torso length, arm length, and preferred riding position.
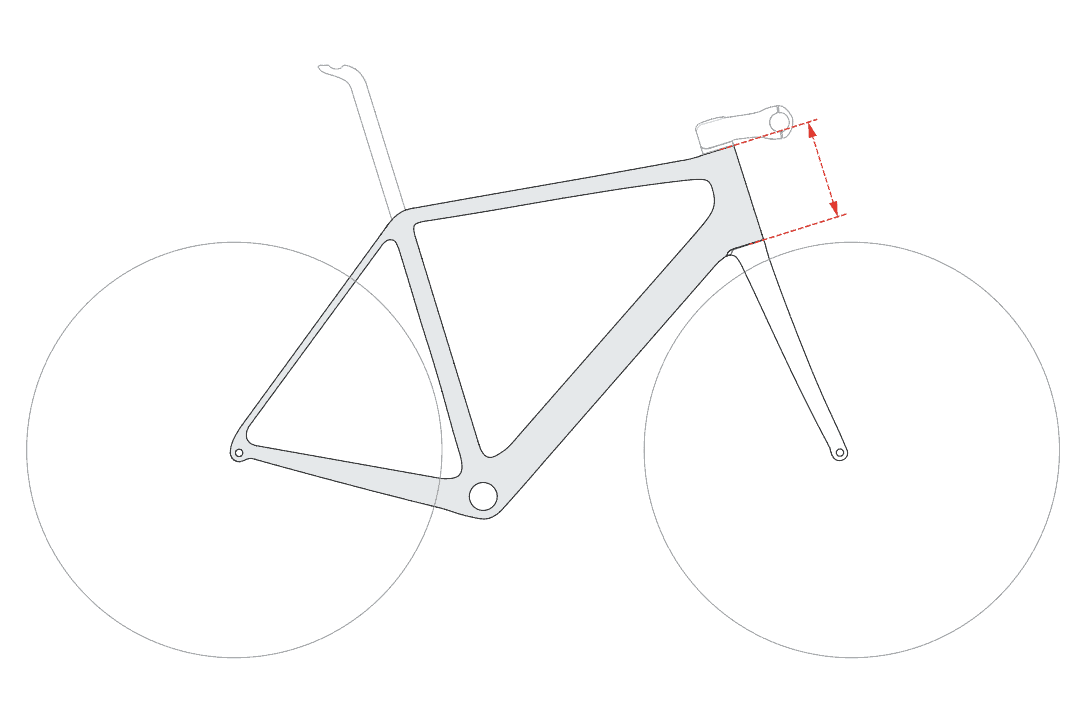
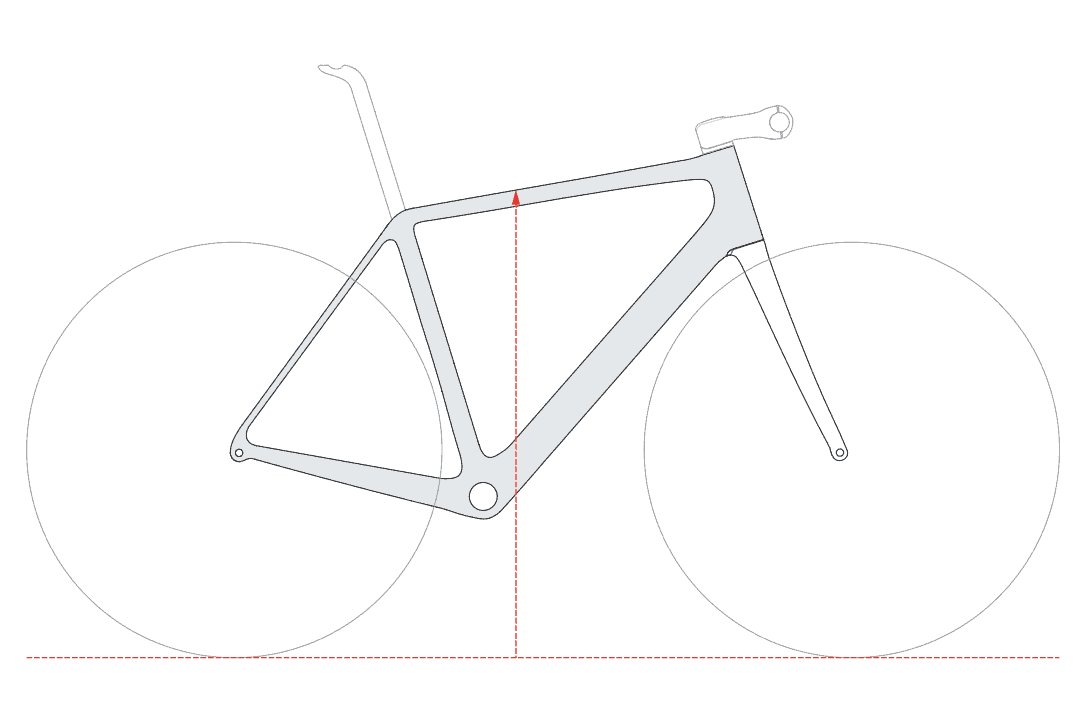
Stack
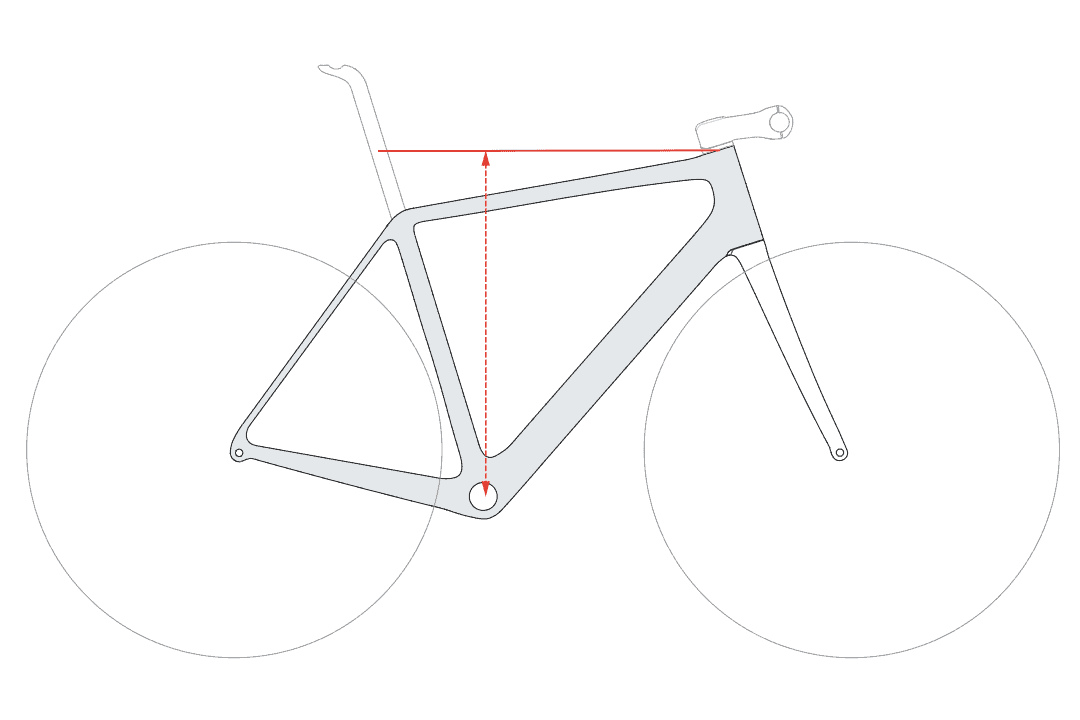
Stack is the vertical distance from the center of the bottom bracket to the top center of the head tube. It plays a crucial role in how upright or low you will be on the bike.
A bike with a higher stack will put the rider in a more upright position, which can be more comfortable for long distances.
A bike with a lower stack will force the rider into a more aerodynamic, but potentially less comfortable, position.
Effective Top Tube (ETT) Length

ETT is the horizontal distance from the top center of the head tube to the center of the seat post, measured along the line of the top tube.
This is important because, in combination with the reach, it determines how stretched out you are on the bike. Generally, a longer ETT results in a more stretched-out position, while a shorter ETT results in a more upright position.
Seat Tube Length
Seat tube length, often used to determine bike size, is the length from the center of the bottom bracket to the top of the seat tube.
It is important for riders with long legs or for determining the standover height. However, many modern bikes have a sloping top tube, which can mean the seat tube length is less of a determinant of bike fit than it was traditionally.
Seat Tube Angle
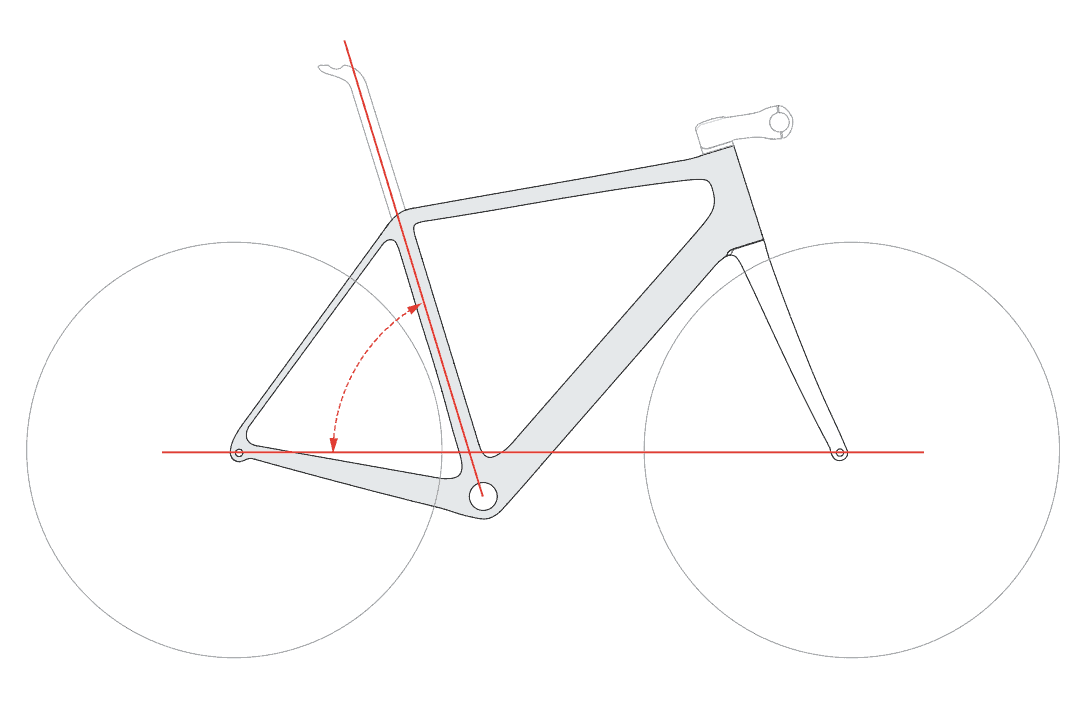
This is the angle of the seat tube relative to the horizontal.
A steeper seat tube angle (closer to vertical) positions the rider more directly over the bottom bracket, which can provide more efficient power transfer, especially during hard efforts.
However, it may also place more weight on the rider’s hands, which can lead to discomfort over long distances.
Head Tube Length
A longer head tube raises the height of the handlebars relative to the bottom bracket, resulting in a more upright, relaxed riding position.
Conversely, a shorter head tube will require the rider to lean forward more, lowering their center of gravity and reducing wind resistance. However, this may lead to discomfort on long rides or for riders with limited flexibility.
Head Tube Angle
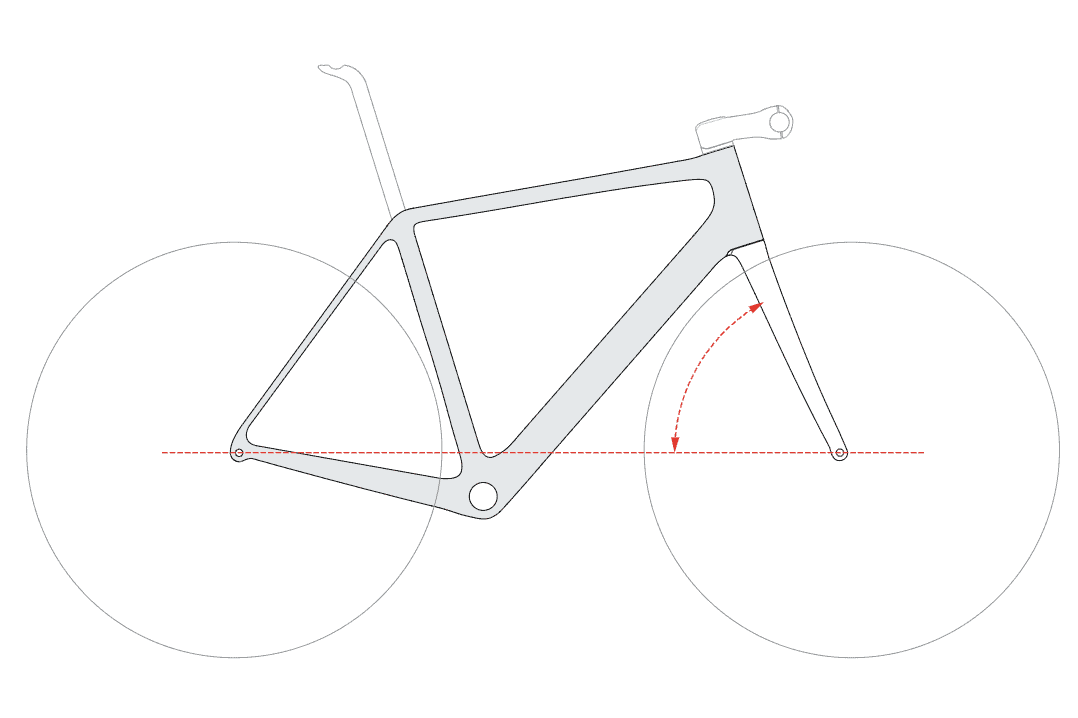
The angle of the head tube relative to the horizontal can significantly affect a bike’s handling.
A steeper angle (closer to vertical) results in quicker steering response, which can be beneficial in technical or tightly-curved courses but may feel twitchy at high speeds.
A slacker angle (further from vertical) provides more stable steering, which can inspire confidence at high speeds or during descents, but may feel less responsive at slow speeds.
Chainstay Length
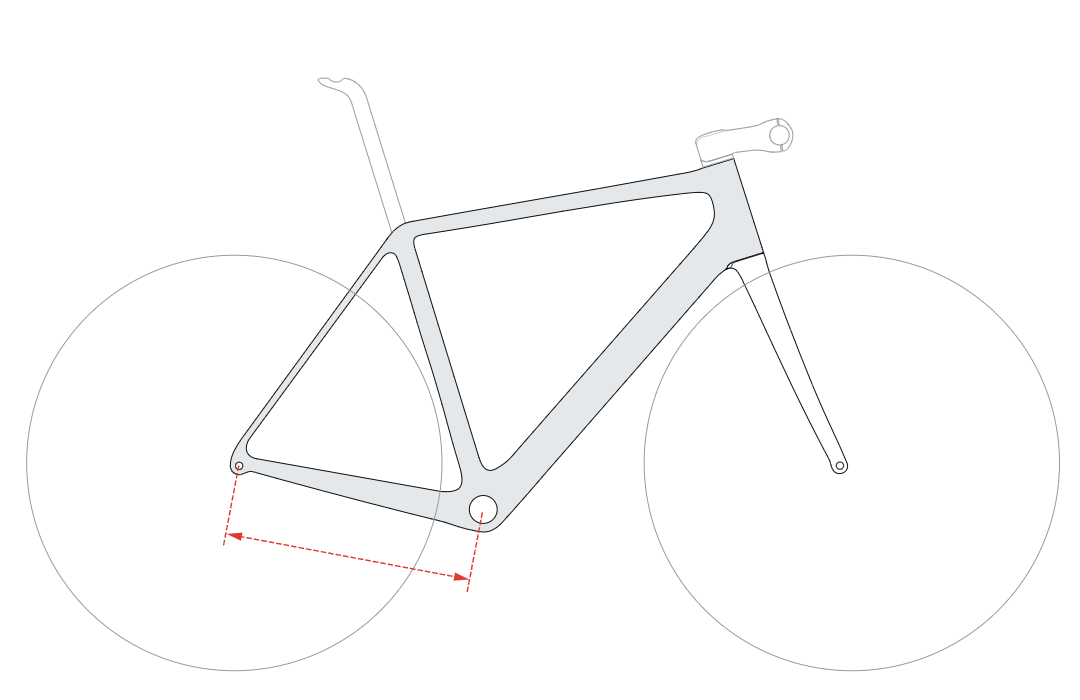
This is the distance from the center of the bottom bracket to the center of the rear axle.
Longer chainstays distribute the rider’s weight more evenly between the front and rear wheels, leading to more stable handling, especially when carrying loads.
Shorter chainstays concentrate more weight over the rear wheel, making the bike feel more responsive, especially during accelerations or climbs.
Wheelbase
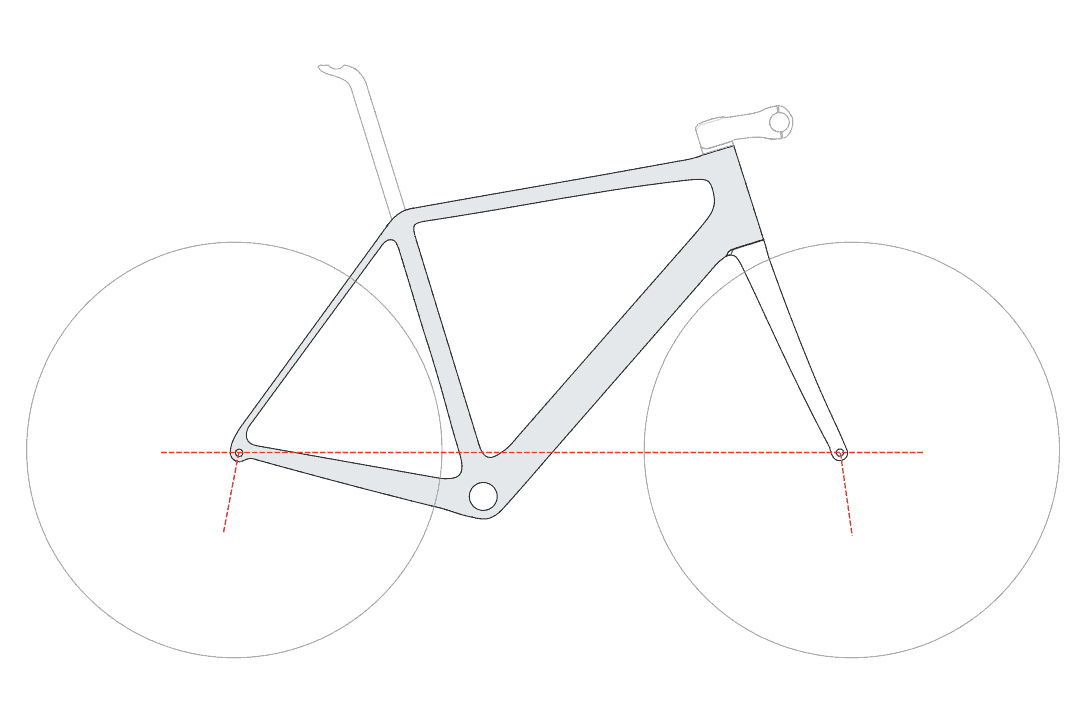
Wheelbase is the distance between the centers of the front and rear axles.
A longer wheelbase leads to more stable handling and a smoother ride, as it better absorbs road imperfections. A shorter wheelbase results in quicker handling, making the bike feel more agile, especially in tight turns.
Bottom Bracket Drop
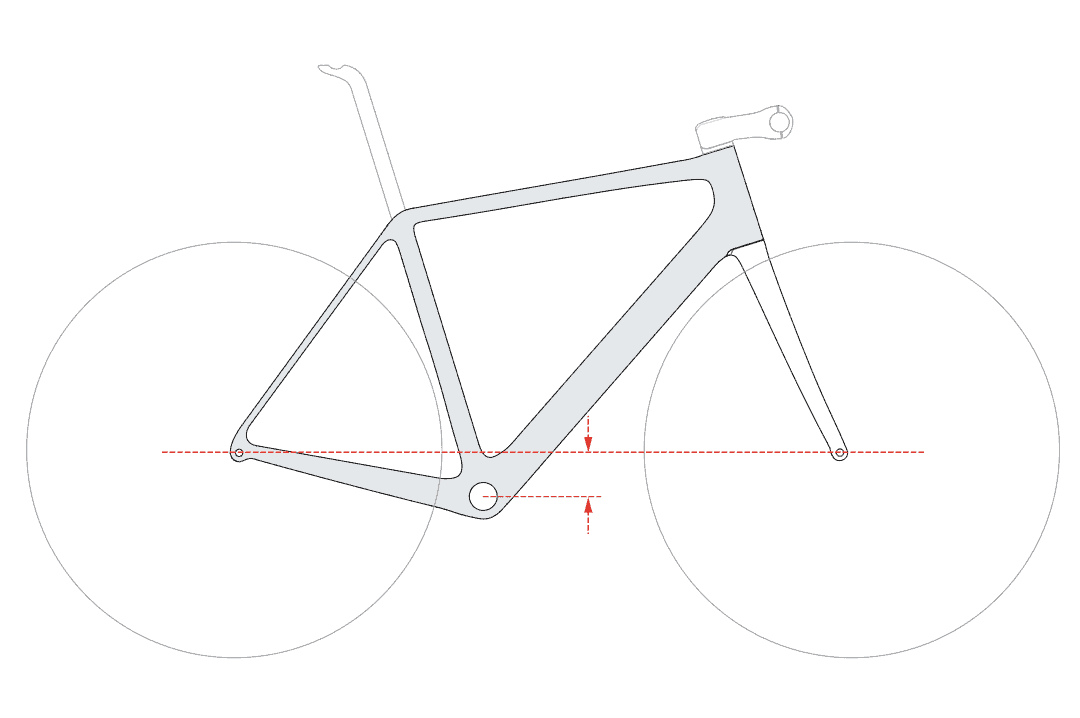
This is the distance the center of the bottom bracket is below the line between the centers of the front and rear axles.
A larger drop lowers the bike’s center of gravity, improving stability, especially during descents or at high speeds.
However, it also reduces the ground clearance, increasing the risk of the pedals striking the ground during turns.
Bottom Bracket Height
The distance from the ground to the center of the bottom bracket impacts the bike’s center of gravity.
Lower bottom bracket heights can increase stability but reduce ground clearance, making pedal strikes more likely when cornering.
Fork Offset (Fork Rake)
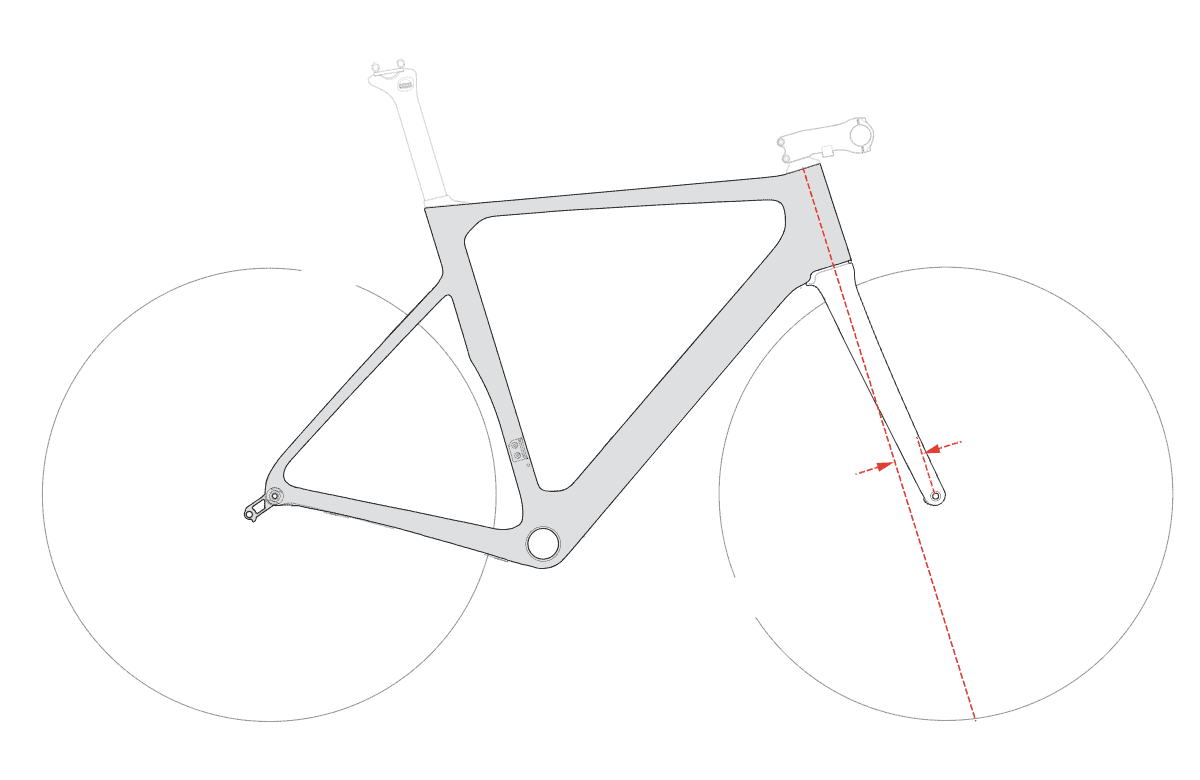
The fork rake is the distance between the fork’s steering axis and the center of the front wheel. More fork rake (a greater offset) leads to faster steering response as it reduces the wheelbase and trail.
This could be beneficial in criterium races with lots of tight turns, but it might make the bike feel less stable at high speeds. Less rake (smaller offset) results in slower but more stable steering, which might be preferable for endurance rides and descents.
Fork Trail
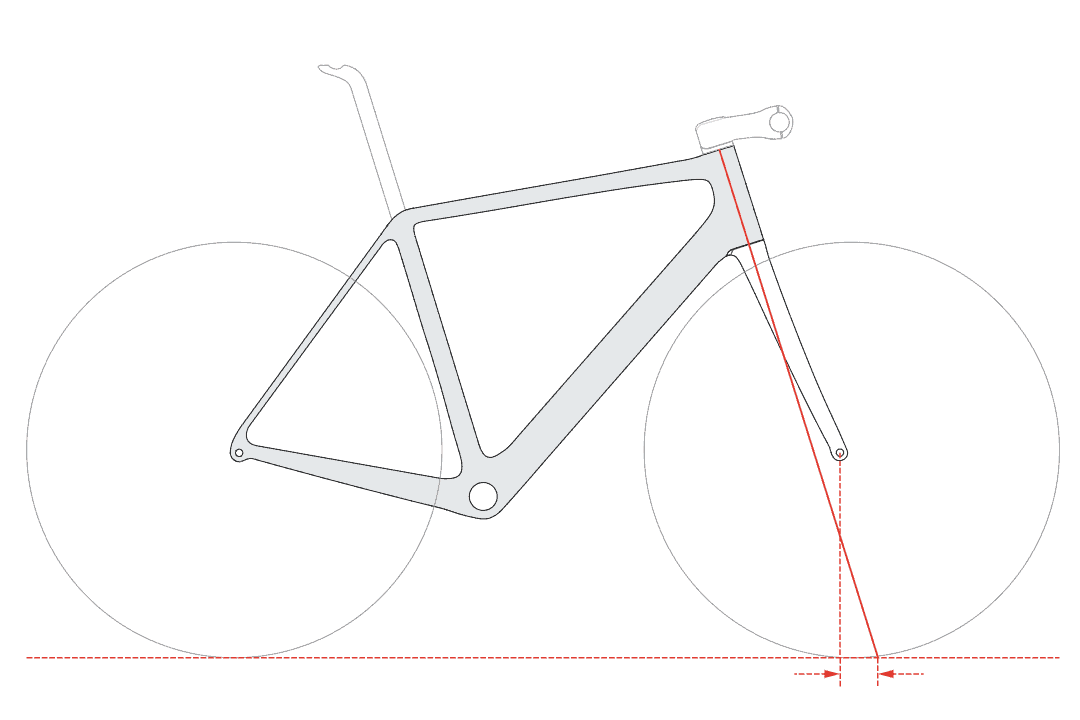
Trail is the distance between where the front wheel touches the ground and where an imaginary line drawn down the steering axis hits the ground.
Bikes with more trail will feel more stable but may be harder to steer, while bikes with less trail will be more responsive but might feel twitchy or unstable at speed.
Standover Height
Standover height is the clearance between the top tube of the bike and the rider’s crotch when they are standing over the bike with their feet flat on the ground.
It’s important for safety and confidence, particularly in situations where you need to put your feet down quickly.
Front Center Distance
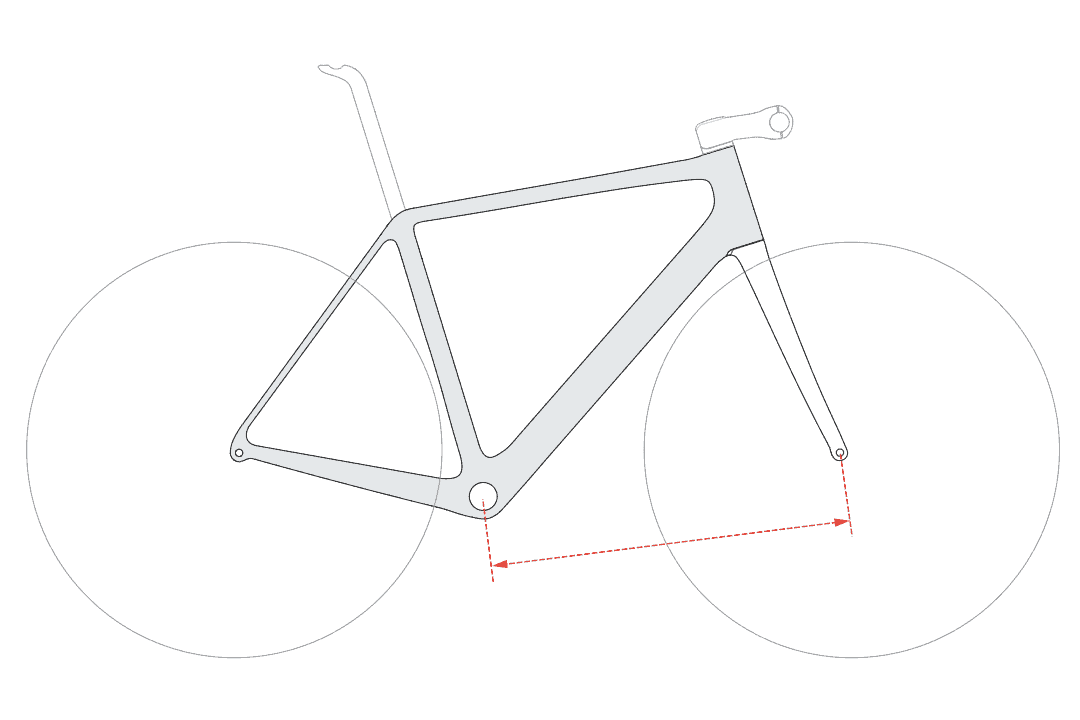
The front center is the distance from the center of the bottom bracket to the center of the front axle.
A larger front-center distance can provide more stability and room for the rider but might make the bike feel less agile.
Rear Center Length
This is the distance from the bottom bracket to the rear axle.
A shorter rear-center length can make the bike handle more nimbly, but might also make it feel less stable, particularly at high speeds.

Alex Lee is the founder and editor-at-large of Mr. Mamil. Coming from a professional engineering background, he breaks down technical cycling nuances into an easy-to-understand and digestible format here.
He has been riding road bikes actively for the past 12 years and started racing competitively in the senior category during the summer recently.